After you have received your SSL certificate from the CA (Certificate Authority) via email, locate the file your_domain.cer or your_domain.p7b and follow the instructions below. In case you don't have a .p7b and no .cer file but a .crt, you can simply rename the .crt into a .cer file extension and will be fine.
1) Start Internet Information Services (IIS) Manager by tying “inetmgr” into the search field near Start button or in the Run window, which can be launched by pressing the WIN+R hotkey.
2) Double click the Server Certificates icon located in the IIS Manager’s center panel.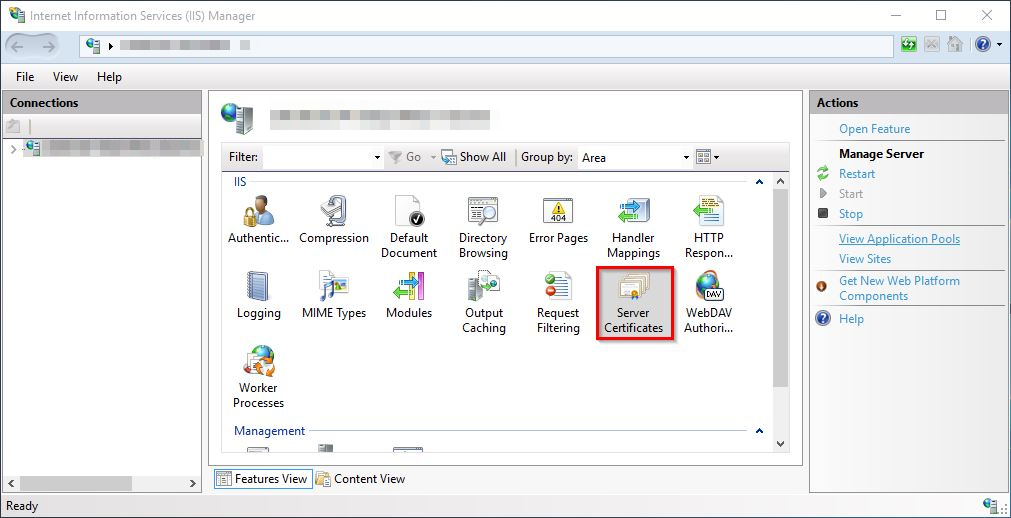
3) Move the mouse cursor over the Actions panel on the right side of the window and click Complete Certificate Request.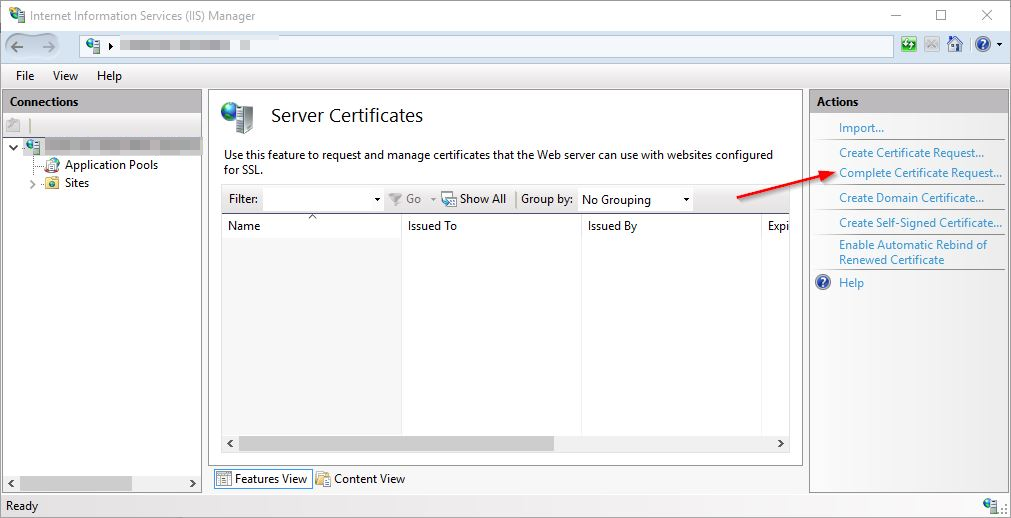
4) The screen "Specify Certificate Authority Response" contains three important fields:
- File name containing the certification authority’s response – browse the file system to find your certificate file (.cer or .p7b)
- Friendly name – this field helps you to easily locate a particular certificate. Typically the domain name of your ssl website would be used in this field.
- Select a certificate store for the new certificate – the default value Personal should not be changed.
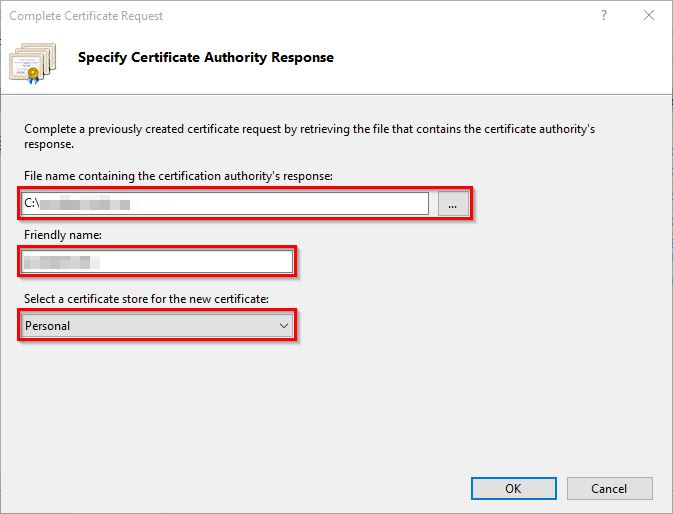
5) When all fields are filled, click OK to import the certificate into the server storage.
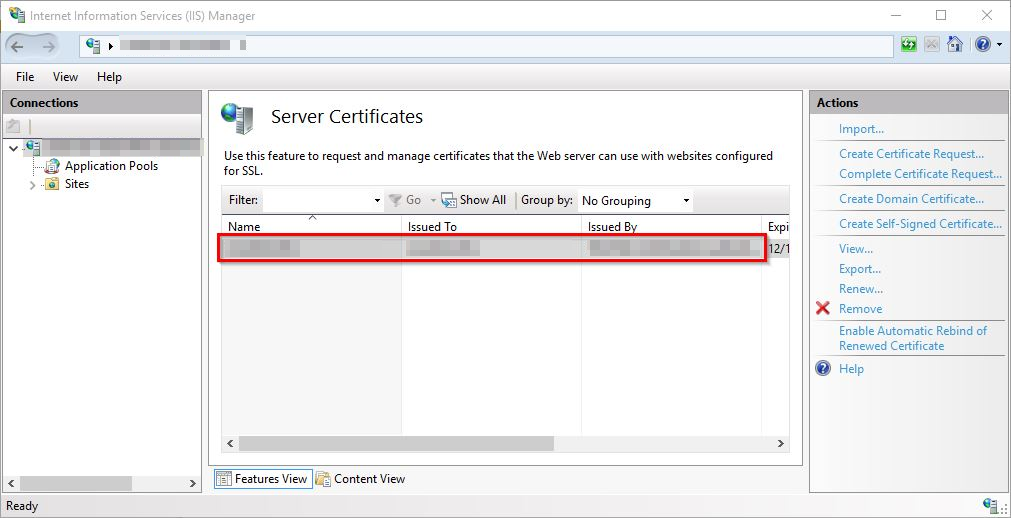
6) If the SSL import has been successful, a new entry will appear on the Server Certificates page.
7) Your installed SSL certificate must now be assigned to a website by binding to a secure port. To do this, expand the Sites subsection in Connections on the left side of IIS Manager. Select the corresponding website. Then move the mouse back over the Actions panel and select Bindings….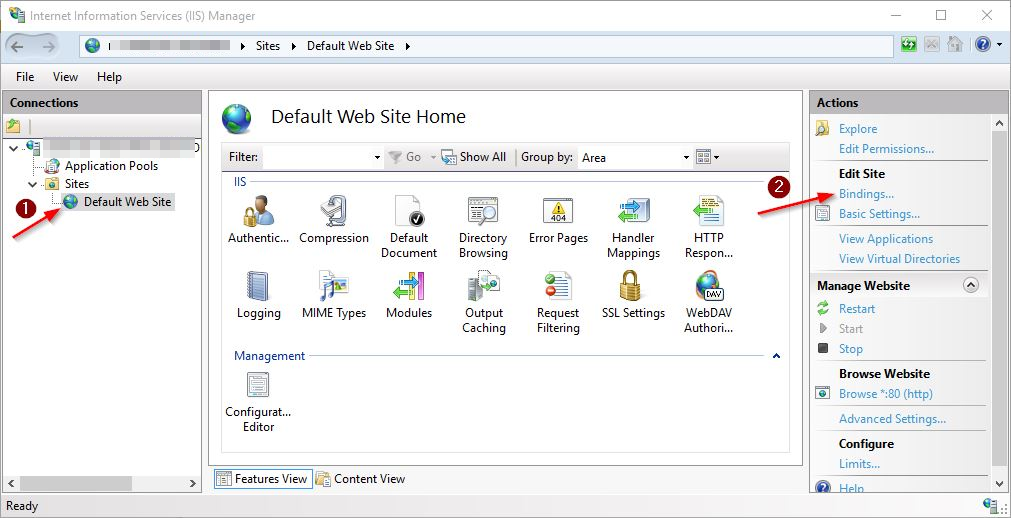
8) Click Add... on the right side of Site Bindings popup.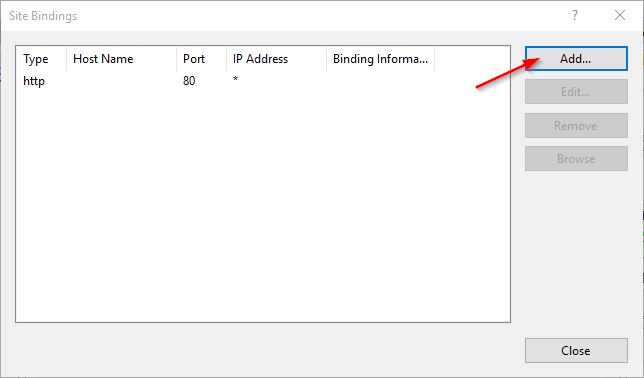
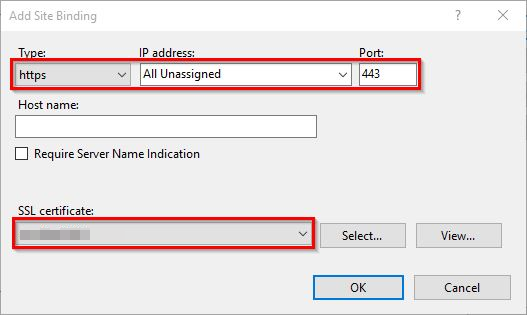
9) Several fields need to be modified on the next window:
- Type – select “https” from the drop-down menu;
- IP address – choose the specific IP address or “All Unassigned”;
- Port – specify the port number for a secure connection. The default port number is 443;
- SSL certificate – select the correct certificate, identified by the previously chosen Friendly name.
10) Click OK to bind the selected SSL certificate with the site. The new entry should appear in Site Bindings window.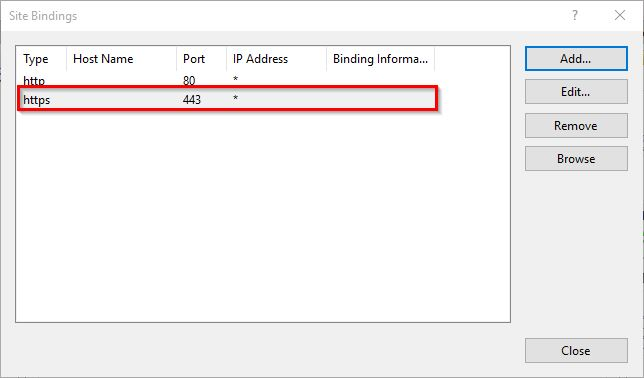
11) Now the website should be accessible via secure HTTPS connection.
To check if the certificate has been successfully installed, you can use our SSL checker.